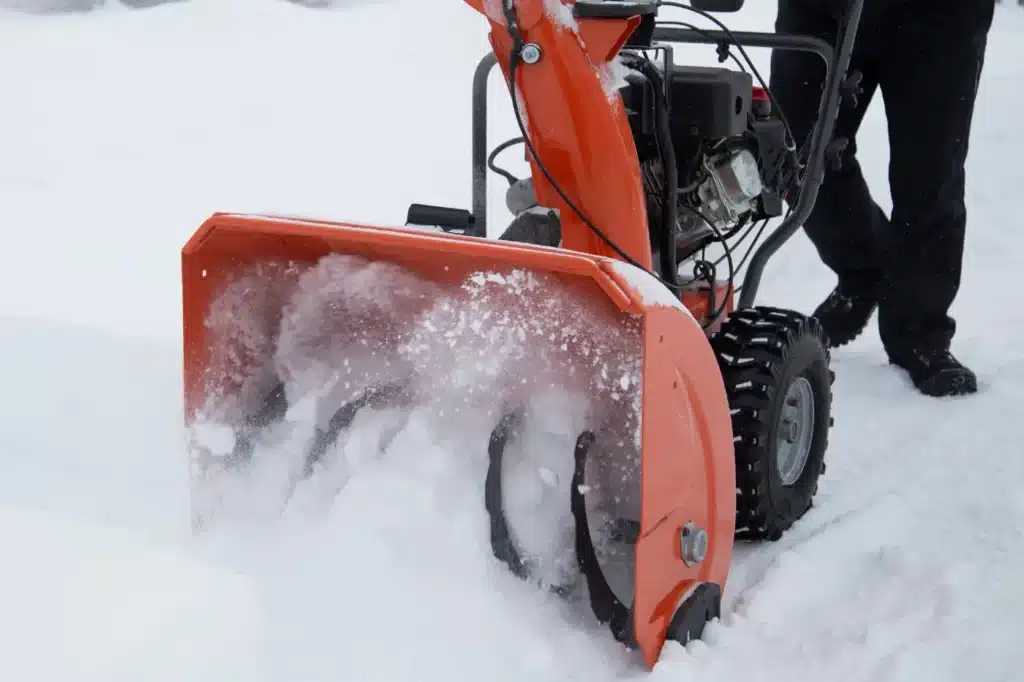
Picture this: you’re in the middle of a Winter Storm Warning, and the snow is flying. There’s already a good few inches on your driveway, and you know you’re going to have to drive somewhere tomorrow. So, you put on your snow boots and head to the garage to start up the snow blower.
And nothing happens…
Because your snow blower won’t start.
Now, Ty’s Outdoor Power is always open 24/7 in a Snow Emergency, and we do our best to take care of every customer, but you can save yourself some stress (and a lot of shoveling) with a little preseason snow blower maintenance!
Getting your snow blower ready for winter is easy if you follow a few simple steps. With just a little time and effort, you can keep your home safe and clear from snow. Each step is important, and they all work together to make sure your machine starts and runs smoothly every time you need it this winter.
Your Preseason Snow Blower Maintenance Checklist
By taking the time to check your machine before the snow starts flying, you can avoid problems later. A little maintenance now can save you a lot of trouble.
In this blog post, we’ll guide you through each step. You’ll learn how to check the oil, clear the fuel system, and inspect the belts and cables. We’ll also cover the importance of testing the snow blower. With this preseason maintenance checklist, you’ll be ready when winter arrives. Follow these steps, and you’ll have peace of mind knowing your snow blower is ready for action.
Check the Filters and Lines
First, check the fuel filter if your unit has one – only about 10% of snow blowers do, which means this step can be forgotten. These filters are usually found near the fuel line. Look for dirt and debris. If it’s clogged, replace it. Next, examine the fuel lines themselves. Look for cracks or leaks, especially near the gas tank. If you see any damage, you’ll need to replace that line.
Finally, check the wiring. Look for any loose or damaged wires. (Mice love to chew those things!) Repair or replace them if needed.
Check the Connectors
Checking the connectors on your snow blower is an important part of maintenance. Connectors include shear pins, nuts, bolts, and welds. If these parts are loose, damaged, or broken, your snow blower might not be safe to operate and could cause serious injuries.
Start by visually inspecting the pins. Make sure they are secure. If any pins are missing, replace them. Next, look at the nuts and bolts. Use a wrench to ensure they’re tight. If you find any loose bolts, tighten them up. Check for any rust, excessive wear, or damage, and repair or seal anything you can.
Finally, inspect the welds. Make sure they look strong and secure. If you notice cracks or breaks, it’s time to get them repaired. That usually requires a professional.
Check the Fuel
Checking the fuel in a snow blower is simple. First, make sure the machine is off and cool. Find the fuel cap on top of the gas tank. Unscrew the cap and look inside. You should see fuel. If the tank is low or empty, it needs more fuel.
If you find old fuel in the snow blower, and you’re not absolutely positive it was stabilized, it’s best to change it. Old fuel can cause problems and really gum up the works in any gas-powered engine, and snow blowers are no exception.
To start, place a clean container under the fuel tank. Be sure the container is big enough! Unscrew the fuel cap and carefully pour out the old fuel.
Next, fill the tank with fresh fuel and fuel stabilizer. Make sure the fuel is suitable for small engines! Avoid using gasoline that has been sitting for more than a month. Once you fill the tank, replace the cap tightly.
Check the Spark Plug
Checking and changing the spark plug in your snow blower is another simple but essential preseason step.
Make sure the snow blower is off. Locate the spark plug. (It’s usually on the side of the engine.) Use a socket wrench to remove the spark plug. Turn it counterclockwise until it comes loose. Be careful not to damage the surrounding area.
After you take it out, check its condition. Look for cracks, burnout, or heavy dirt. A worn-out spark plug needs replacing.
If the spark plug looks good, you can clean it. Use a wire brush to remove dirt, or use compressed air to blow away debris. That can help it work like new.
If you need a fresh spark plug, get one that fits your model. Place it in the hole and tighten it right. Just turn it clockwise until it’s secure, and you’re ready to go.
Check the Wheels, Paddles, Skid Shoes, and Scraper Bars
Checking the wheels, paddles, skid shoes, treads, and scraper bars on your snow blower is an important step before winter hits. For single-stage units, you likely have wheels, paddles, and scraper bars. On two-stage units, you’ll want to check the skid shoes and scraper bars. Each of these parts are vital to protecting the unit from damage and throwing snow properly.
Start by looking at each component. Make sure it’s not damaged or worn down. If you see cracks or a flat spot, it’s time to replace it. Push the snow blower around—that’s usually enough to identify an issue.
Next, check the wheel bolts. Ensure they’re tight. If any are loose, use a wrench to tighten them.
Now, let’s look at the tire pressure. Proper tire pressure helps the snow blower work well. You can find the recommended pressure in the user manual. Use a tire gauge to check the pressure. If the tires are low, fill them with air until they reach the correct level.
Finally, inspect the treads on the tires. Treads give your snow blower grip on slippery surfaces. If the treads are worn, it may be best to get new tires.
Don’t Forget the Lubricant!
Your snow blower needs oil, and not just in the engine.
Let’s start with checking and changing that engine oil, though. Find the oil dipstick. Pull it out and wipe it clean. Then, put it back in and pull it out again to check the level. If the oil is low or dirty, it’s time to change it. To do this, drain the old oil into a container. Then, refill it with fresh oil according to the manufacturer’s instructions.
Next, you should oil or lubricate other parts of your snow blower. Check the different moving parts, such as the auger, auger shaft, and drive system. These parts need lubrication to work well. Use a suitable grease or oil for this. It helps prevent wear and tear, keeping your snow blower running smooth. You may need to put some 3-in-1 or WD-40 on any hinges for snow blowers that collapse for storage.
Don’t Skip the Test Run
Starting your snow blower after preseason maintenance is really important. This step helps you check that everything works correctly. After you’re done with the checks and changes, start your snow blower up in a well-ventilated area.
When you start your snow blower, let it run for about five to ten minutes. This time helps the engine warm up and allows the oil and any fuel stabilizer to circulate properly. It also lets you listen for any unusual sounds. Pay attention to how the machine runs. If you notice anything odd, like strange noises or smoke, turn it off right away and call in the pros.
Doing this simple test run can prevent trouble when it’s time to clear the snow. Your winter will be much easier if your equipment is ready to go!
KEEP READING: Ty’s Tips – Get the Best Performance from Your snow blower This Winter
No Time to DIY? Let Ty’s Help.
DIY isn’t for everyone. If you’d rather spend your fall free time watching football and enjoying the great outdoors, we’ve got your back.
The team at Ty’s Outdoor Power knows what to do to get your snow blower ready for winter! We’ll inspect all parts and make sure everything works just like it did when Old Faithful was brand new.
For 20 years, the team at Ty’s Outdoor Power has been proud to help homeowners, acreage owners, and commercial snow removal businesses keep people and properties safe when the snow starts flying. We’re Nebraska’s outdoor power superstore and are proud to be this state’s first choice for small engine service and snow removal equipment!


